Truelancer Workflow Tutorial for Freelancers
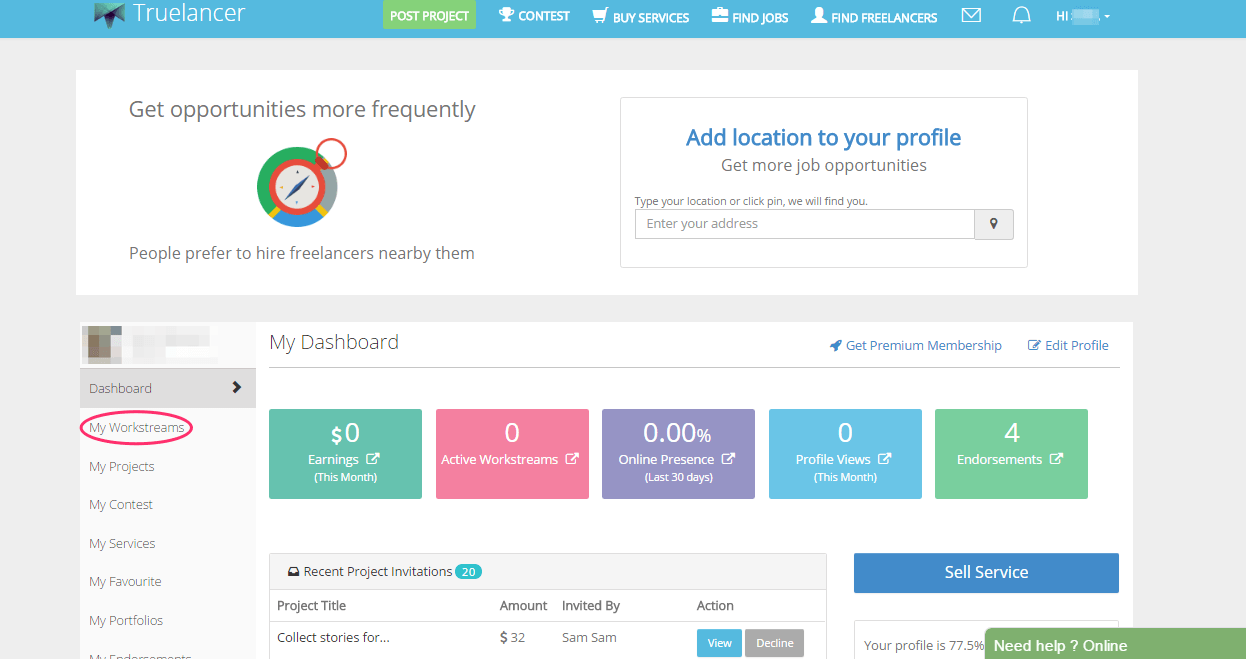
A Workstream on Truelancer is a collaboration tool to facilitate all sorts of communication between the Freelancer and Employer on Truelancer. It provides all the management tools and options that you need to get a project done on Truelancer. It is very important that you discuss all the details, scope, terms regarding your Project in the Truelancer Workstream to keep your Project going on smoothly on Truelancer. Even if you discuss the terms outside, we encourage you to post it on Workstream and have your employer agree to those terms (This will only help you get your refund in case a conflict arises).
Are you looking for Workflow tutorial for Employers?
Step-by-step guide to using Workstream (For Freelancers):
Step 1:
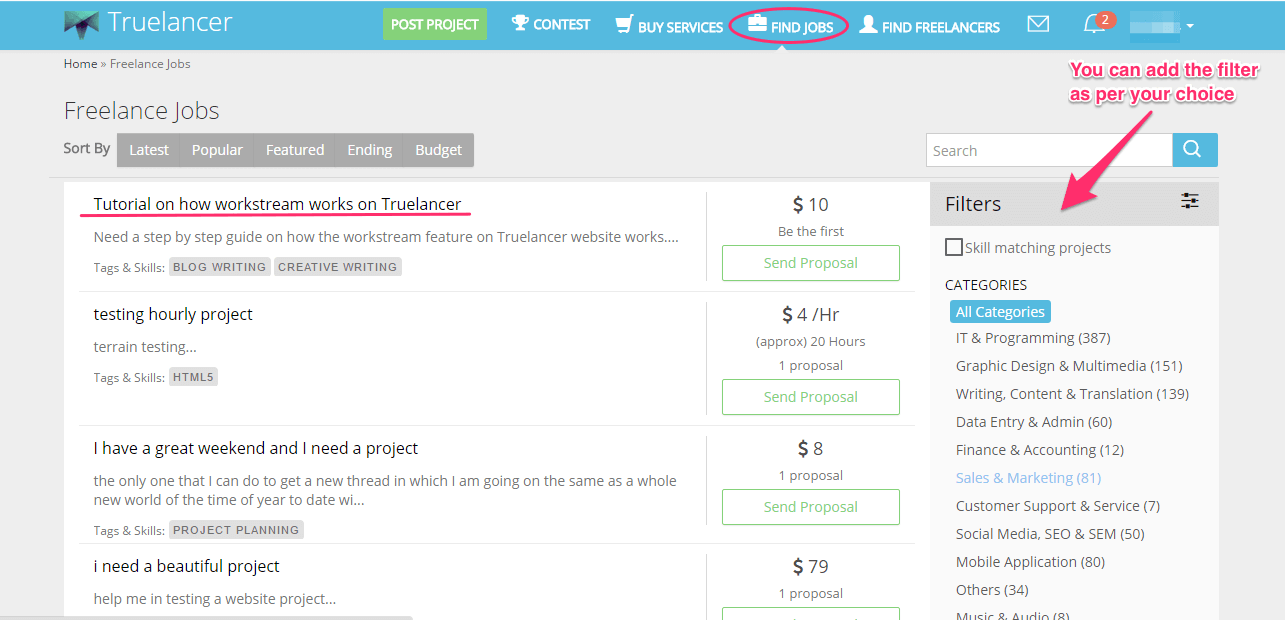
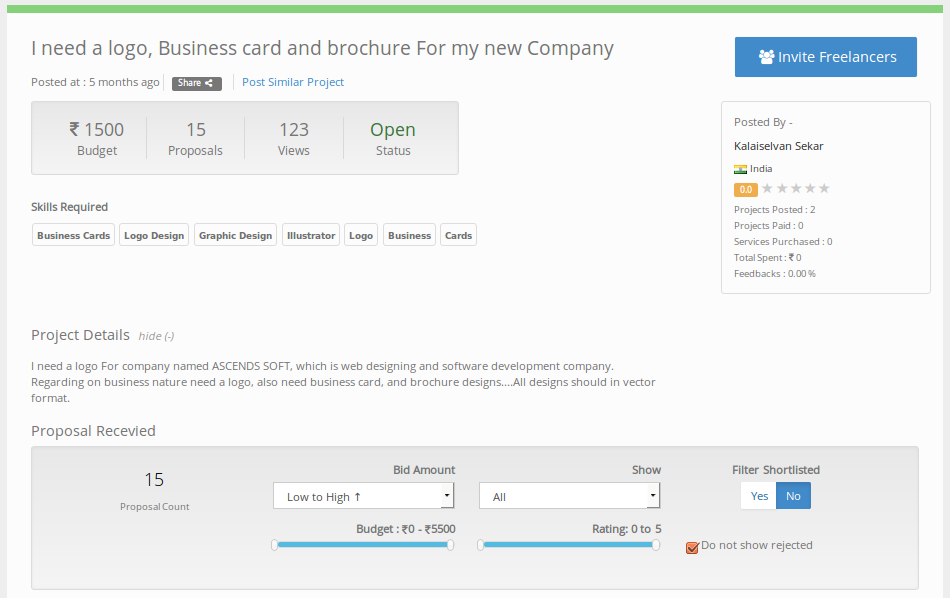
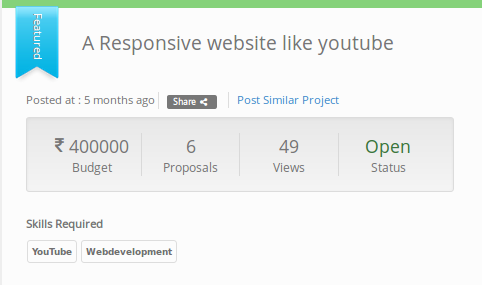
After logging in, click on “Find jobs” on the top of the page and this web page will appear. On right side you can add the filter according to the field you want the job in. Refresh the page. You will get the jobs according to the skills you fill. Now, You can click on the job to view the job description.
Step 2:
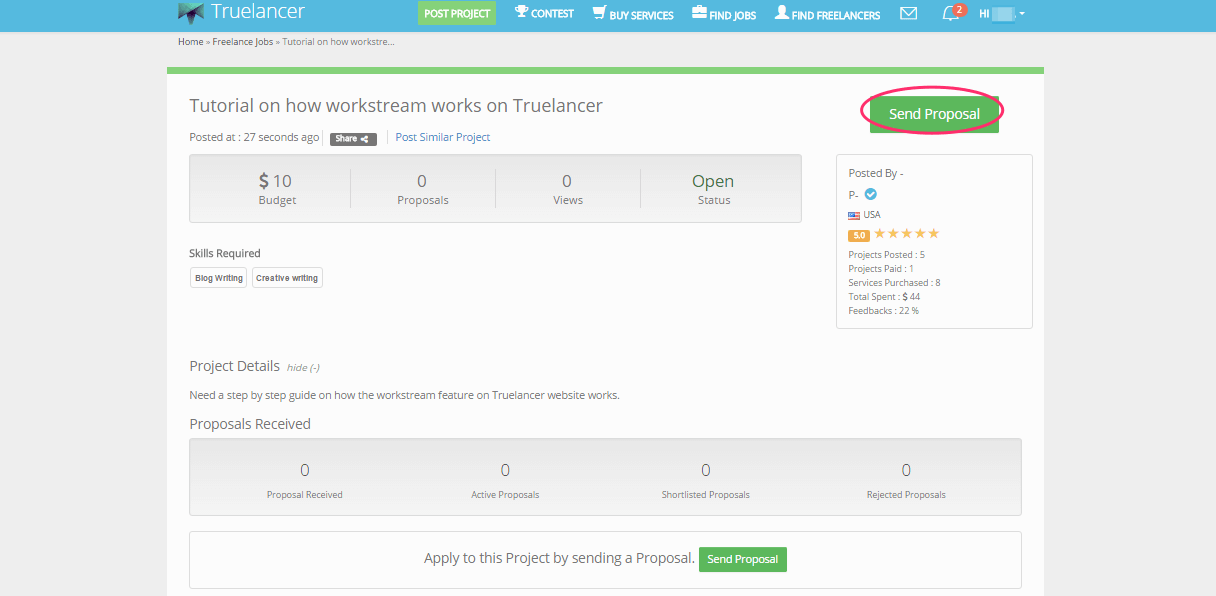
Once you are sure that you want to send a proposal on a Project, you can click on the Green “Send Proposal” button.
Step 3:
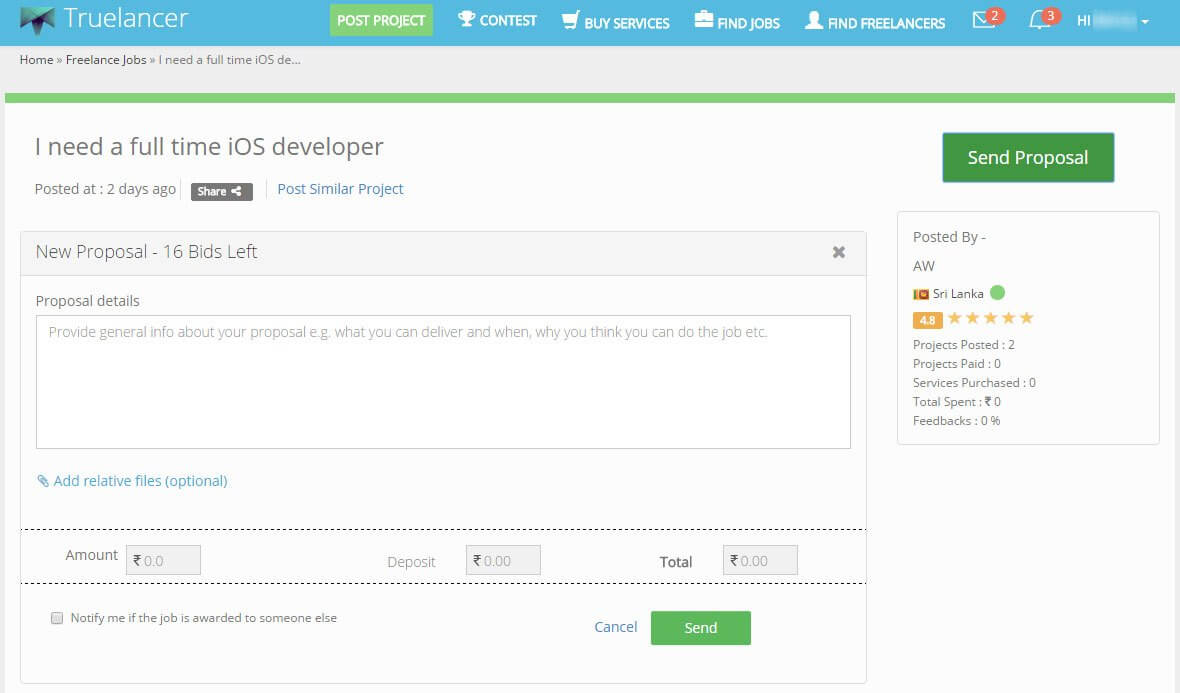
Proposal form opens up once you click on “Send Proposal” button. Fill in the proposal details, the amount and deposit .
What is amount – It is the money demanded by you for the completion of the project.
What is Deposit – It is the amount you demand for the client to start the project. Generally, for Big projects, The client can be requested for 45% of the total amount and for smaller projects it’s the entire amount.
Note: Once the client hires you, the “deposit” amount would be deposited in Truelancer’s account. Other than what you put in your proposal, you can make your proposal better by using the following two add-ons :
Featured: Only one featured proposal is taken for a project. Your bid is featured at the top of other proposal & therefore is 40 times increased chances to be awarded You will be charged $5 to feature one proposal.
Elite: Highlight your proposal to stand out from other bidders. You will get more attention. You will be charged $1 to feature one proposal.
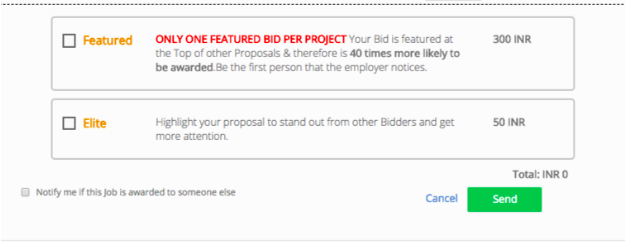
After completing the proposal form, you can click on “Send” button at the bottom of the form.
Step 4:
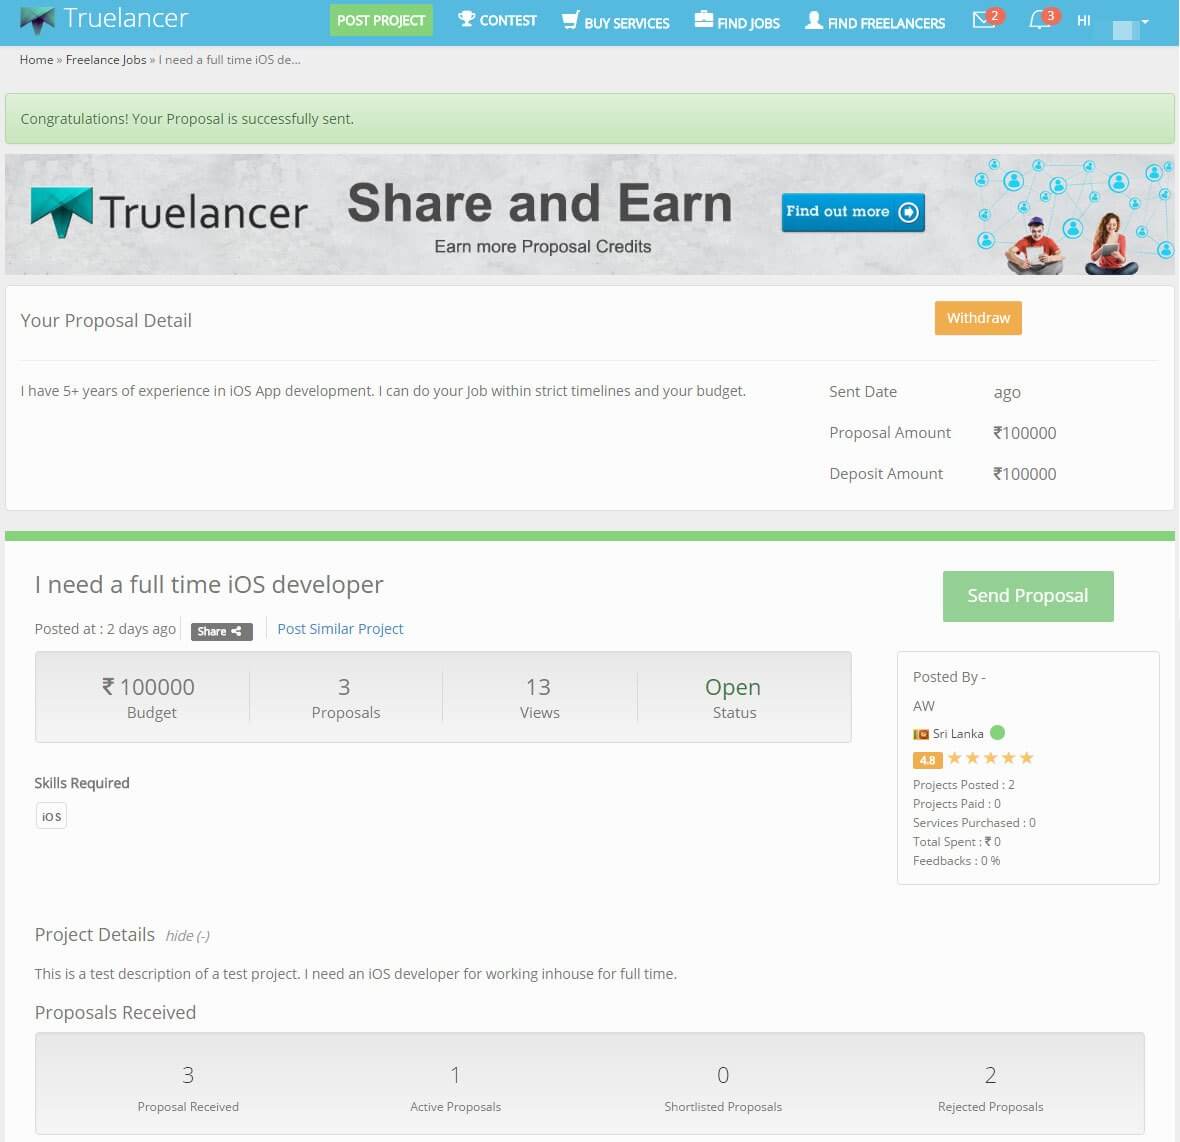
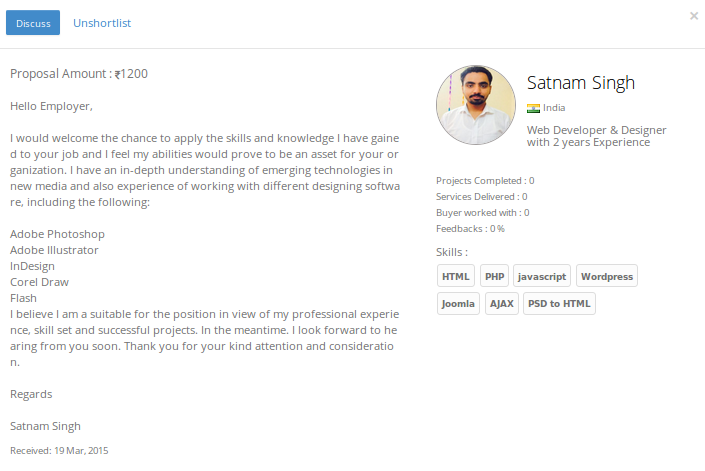
After the proposal is sent, you will be taken to the Project description page. Wait for a response from the Employer, you’ll be notified by an email/notification if the Employer contacts you/responds back or takes an action
Step 5:
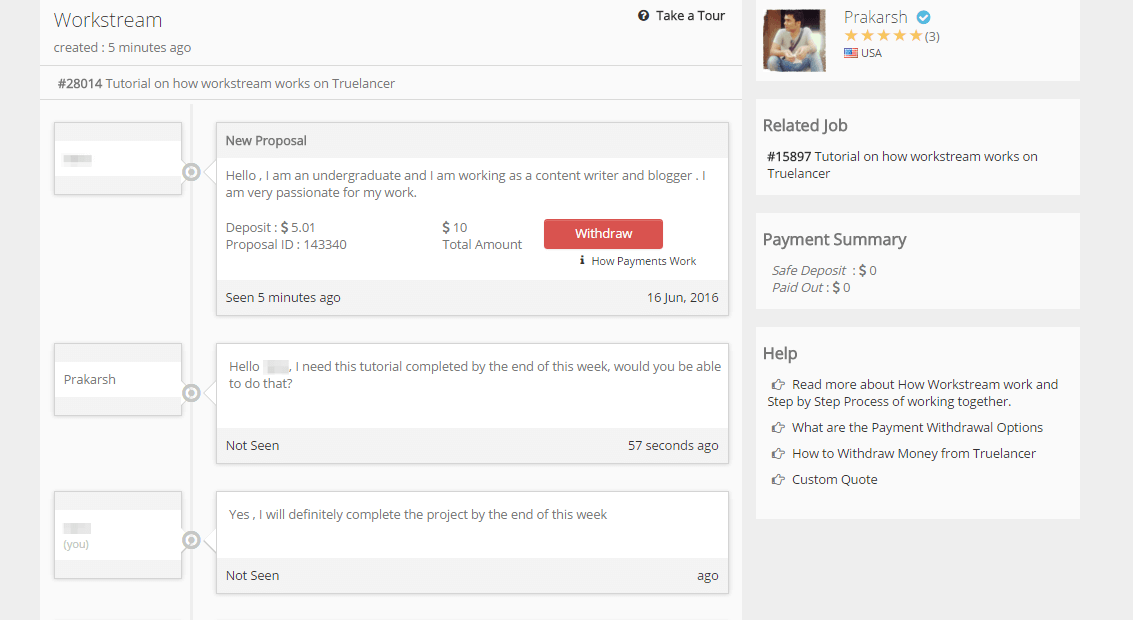
Once the Employer contacts you, a workstream is created between you and the employer.
If you are a pro member a workstream is automatically created between you and your freelancer. This is the workstream where you can discuss the project details with the employer before he/she accepts your proposal. You can chat, discuss the Project and update your employer.
Step 6:
If the client finalises to hire you and you want to change the amount, you need to follow these steps :
- Click on withdraw proposal on the right side.
- Refresh the page.
- Now, You will get the new proposal at the bottom left of the workstream from here you can update and change the amount.
Step 7:
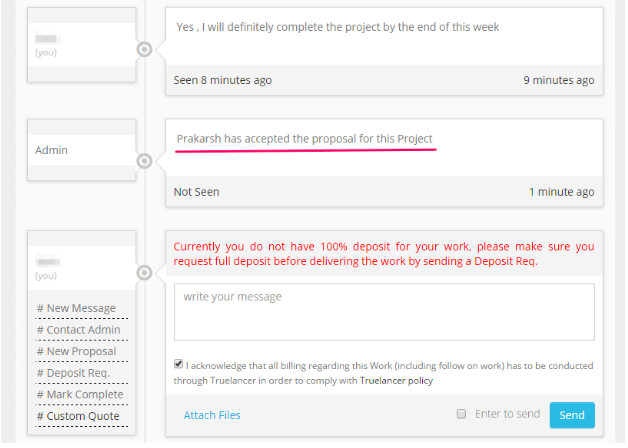
You will get the underlined message from the Admin once your proposal is accepted. You can begin working on the project after the Proposal acceptance message.
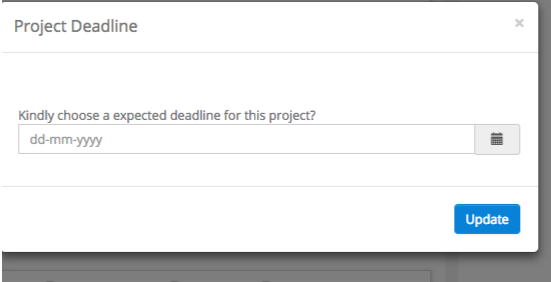
Now, client has awarded the project, kindly put all requirement in the document with the tentative deadline in the workstream. In order to be secured in case of any conflict arises.
*This payment is securely held with Truelancer and is transferred to you once the freelancer has completed the Project (payments can also be released partially to the freelancer in case the Project is worth more than INR 15000 / USD 235). Being a Freelancer, you should always ensure that you have the amount in Truelancer Safe Deposit on which you are working on.*
Step 8 :
You need to update project progress in terms of percentage time to time from the bottom of the workstream.
Step 9:
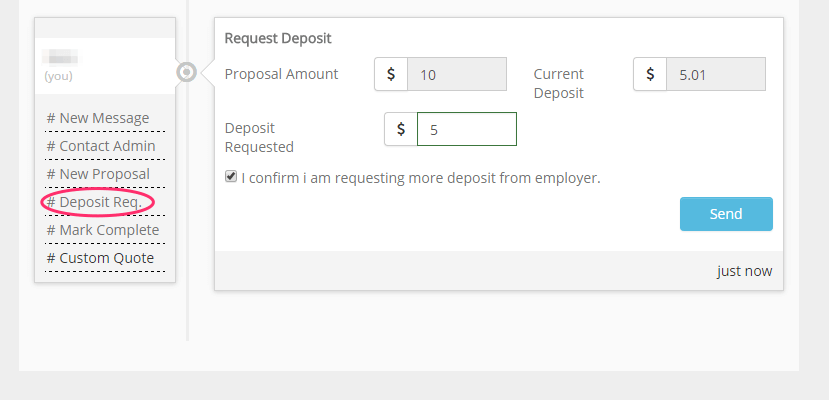
If the initial deposit amount was less than the total project amount, then the freelancer can ask for more deposit by sending a “Deposit Request” request as the Project progresses.
Steps 10:
You can also ask for a partial release of the payments from your Employer if the total Project cost is greater than INR 15,000 or USD 235. You will get the option of partial payment in the bottom left of the workstream.
You will get at Max. 3 times partial payments apart from work completion request.
Step 11:
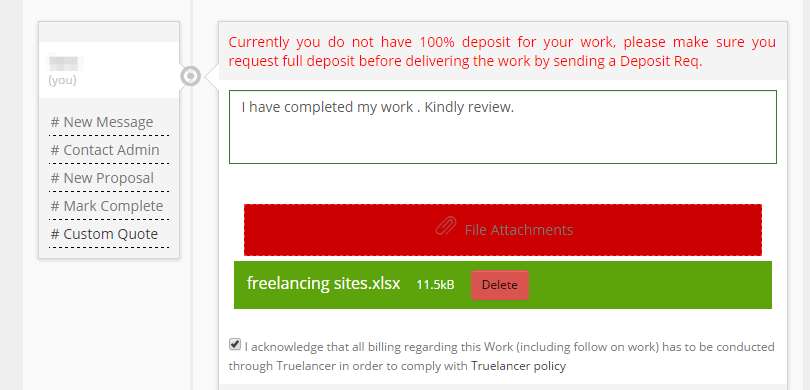
Upon completion of the project, send the file/link to the employer for review and make any necessary changes that he asks for if they are within the scope of your Project.
Step 12:
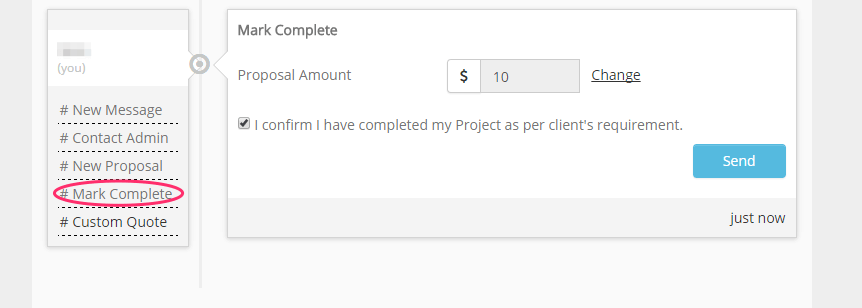
Send the “Mark Complete” request once you have completed the project as per employer’s requirement and wait for the employer to approve it.
Step 13:
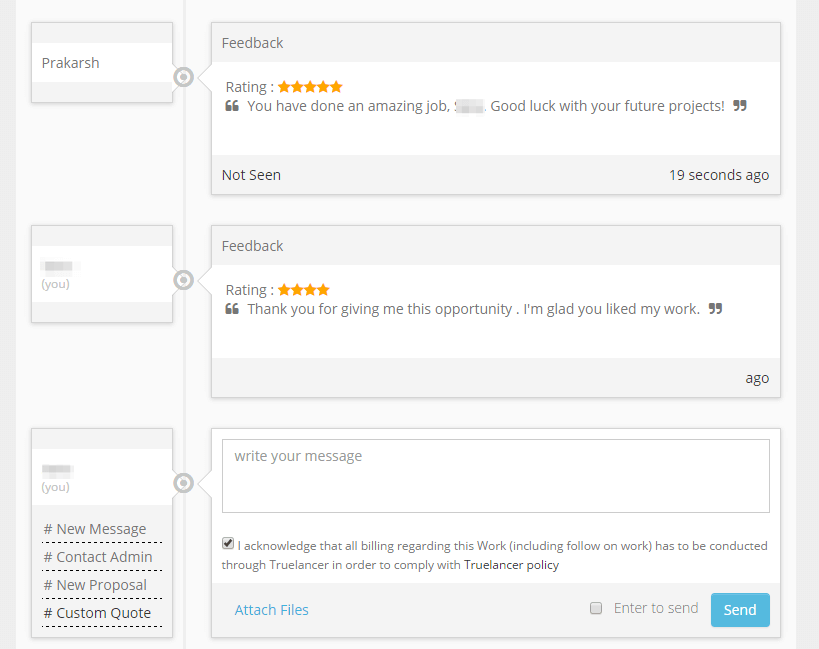
Once the employer has approved your “Mark Complete” request, the feedback pop-up will open where you can share your feedback regarding the experience you had while working for the employer.
Step 14:
Once you have given a feedback, Truelancer Moderators may take some time to review the work and once they’ve reviewed it, you will get a message from the Admin saying that the money has been transferred to your Truelancer wallet.
Once you have the money in your Truelancer Wallet, you can withdraw it to your Bank Account/Paypal Account/Payoneer Account or by other payment withdrawal methods available at Truelancer.
You can read this tutorial on how to withdraw money from your Truelancer Wallet.
Important DO’s and DON’Ts
- Please make sure that you discuss all important terms, specifications, the scope of the Project in the Truelancer workstream itself and make your freelancer agree on it before accepting his proposal.
- Give regular updates to your employer in the Truelancer Workstream. (Even if you are talking outside Truelancer), this helps you in case a conflict arises.
Happy Truelancing!
